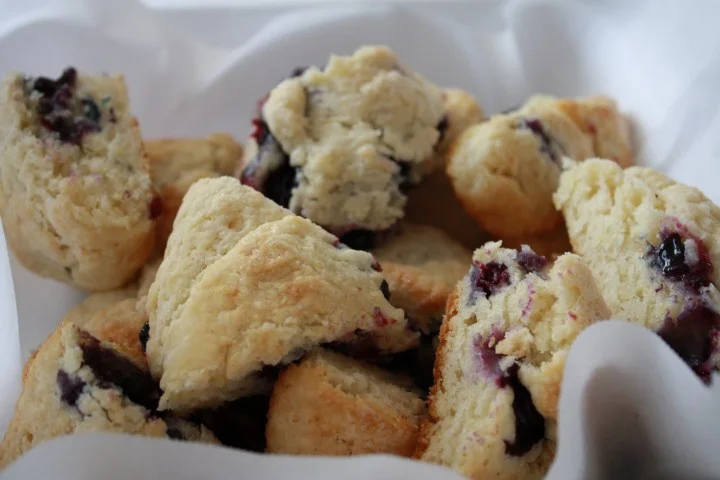
Blueberry Scone
Holy cow – I cannot believe it’s been a month since my last post! It’s been killer at work and have had many social activities that’s too good to pass up. However, this does not mean the cooking has stopped. I’ve been doing versions of a certain fireball that had some office-mates running the other direction at the mention of my food I’m finalizing this so stay tuned, am excited how version 3 turns out. Now the recipe on hand is one of my go-to’s if I’m not feeling particularly adventurous but am in need of something to “wow” the crowd. While I’m sure you’ve seen a million blueberry scone recipes online, I feel strongly about sharing this to add to your repertoire of foolproof basic recipes. This is a recipe I’ve adapted from Cooks Illustrated. There was not much tweaking necessary here.
From my old channel :)
Takeaway
Typical recipes get you scones that are… hard. I’ve never had the “real thing” but I do know what I don’t like about some scones: hard, tasteless and too sweet. My ideal scone ought to hold its shape but remain soft inside. Butter is a must in here. A technique introduced by Cooks Illustrated is grating butter instead of cutting it into the flour. A good rule of thumb when you want soft and flaky dough is to not overwork it. I feel that it’s hard to do this using food processors and pastry cutters, because it takes time to cut the butter into the flour. By grating the butter, you’re left with pieces small enough that all you would need to do is to pat it until it’s combined with the flour.
The tricky part is making sure the butter is the right temperature. You see, butter holds water which steams when you bake it. This steam helps create the layers. When the butter gets too warm before you bake, you lose the moisture. Hence, no steaming – no layers – so you get hard, dense scones. Here are key things to do:
- Freeze the stick of butter before grating.
- Halfway through grating, take what you’ve already grated to the freezer and keep grating.
- Keep the grated butter in the freezer until you’re ready to mix it with your dry ingredients.
- Work quickly when mixing the butter and the flour. If it gets too warm, pop it back in the freezer for 5-8 minutes.
Here you’ve got yourself an all around dough just waiting to envelop the season’s pickings. Take a trip to the farmer’s market or a trusted produce store and pick something awesome. Be choosy, you’ve worked hard at this point to develop a great dough. Taste that fruit and make sure you’re getting something worthwhile. I don’t like to use too much sugar in this recipe so I look for something fully ripened. The natural sugar in the fruit will offset the amount of sugar your taste buds crave. My pick here is classic blueberries, thanks to my favorite Mountain View spot – Milkpail.
This recipe will yield ginormous scones, so feel free to cut them before or after baking if you’re serving them to pals. It looks less intimidating to your prospective tasters. But here’s the secret: it doesn’t matter, they’ll be back for more.
Blueberry Scones
Adapted from Cooks Country
Ingredients
10 tablespoons unsalted butter (2 sticks), frozen whole (see note above)
1 1/2cups fresh blueberries (about 7 1/2 ounces), picked over (see note)
1/2cup whole milk
1/2cup sour cream
2 cups unbleached all-purpose flour (10 ounces), plus additional for work surface
1/2cup sugar (3 1/2 ounces), plus 1 tablespoon for sprinkling
2 teaspoons baking powder
1/4 teaspoon baking soda
1/2 teaspoon table salt
1 teaspoon grated lemon zest
Steps:
Adjust oven rack to middle position and heat oven to 425 degrees. Score and remove half of wrapper from each stick of frozen butter. Following photo at left, grate unwrapped ends on large holes of box grater (you should grate total of 8 tablespoons). Place grated butter in freezer until needed. Melt 2 tablespoons of remaining ungrated butter and set aside. Save remaining 6 tablespoons butter for another use. Place blueberries in freezer until needed.
Whisk together milk and sour cream in medium bowl; refrigerate until needed. Whisk flour, 1/2 cup sugar, baking powder, baking soda, salt, and lemon zest in medium bowl. Add frozen butter to flour mixture and toss with fingers until thoroughly coated. Add milk mixture to flour mixture; fold with spatula until just combined. With rubber spatula, transfer dough to liberally floured work surface. Dust surface of dough with flour; with floured hands, knead dough 6 to 8 times, until it just holds together in ragged ball, adding flour as needed to prevent sticking.
Roll dough into approximate 12-inch square. Following illustrations, fold dough into thirds like a business letter, using bench scraper or metal spatula to release dough if it sticks to countertop. Lift short ends of dough and fold into thirds again to form approximate 4-inch square. Transfer dough to plate lightly dusted with flour and chill in freezer 5 minutes.
Transfer dough to floured work surface and roll into approximate 12-inch square again. Sprinkle blueberries evenly over surface of dough, then press down so they are slightly embedded in dough. Using bench scraper or thin metal spatula, loosen dough from work surface. Roll dough, pressing to form tight log. Lay seam-side down and press log into 12 by 4-inch rectangle. Using sharp, floured knife, cut rectangle crosswise into 4 equal rectangles. Cut each rectangle diagonally to form 2 triangles and transfer to parchment-lined baking sheet.
Brush tops with melted butter and sprinkle with remaining tablespoon sugar. Bake until tops and bottoms are golden brown, 18 to 25 minutes. Transfer to wire rack and let cool 10 minutes before serving.


